

Integrated Development Environment Introduction
IDE stands for Integrated development environment, which is a software application that assists computer programmers for software development. From the previous chapters, you will know that there must be a compiler to run C programs or an interpreter to run Python programs.
In actual software development, we often need more auxiliary software (such as language editor, build automation tools, debugger, etc.) These tools are usually packaged together for distribution and installation (such as PythonWin, MacPython, PyCharm, etc.). They are referred as Integrated Development Environment (IDE).
Therefore, it can be said that the integrated development environment is a combination of a series of development tools. For example, a desktop computer, the core component of a desktop computer is the host computer, with the combination of peripheral components such as mouse, keyboard, webcam, etc., they can assist the user when using desktop computer.
In general, there are many IDE categories that software programmers can choose to use them. For instance, as Python programmers, you can choose IDLE that comes with Python or you can choose PyCharm and Notepad++ as IDEs.
How to download PyCharm?
PyCharm is an IDE development tool which developed by JetBrains (www.jetbrains.com). Figure below shows the development tools developed by JetBrains. These tools can be used to write programming languages such as Python, C/C++, JavaScript, Java, PHP, etc.
1. Go to the official PyCharm download link here
2. You can see there are 2 versions of PyCharm:
a. Professional Edition: This edition needs to be paid and also provide free trial for first 30 days.
b. Community Edition: This edition is completed free. This edition is highly recommended for beginners.
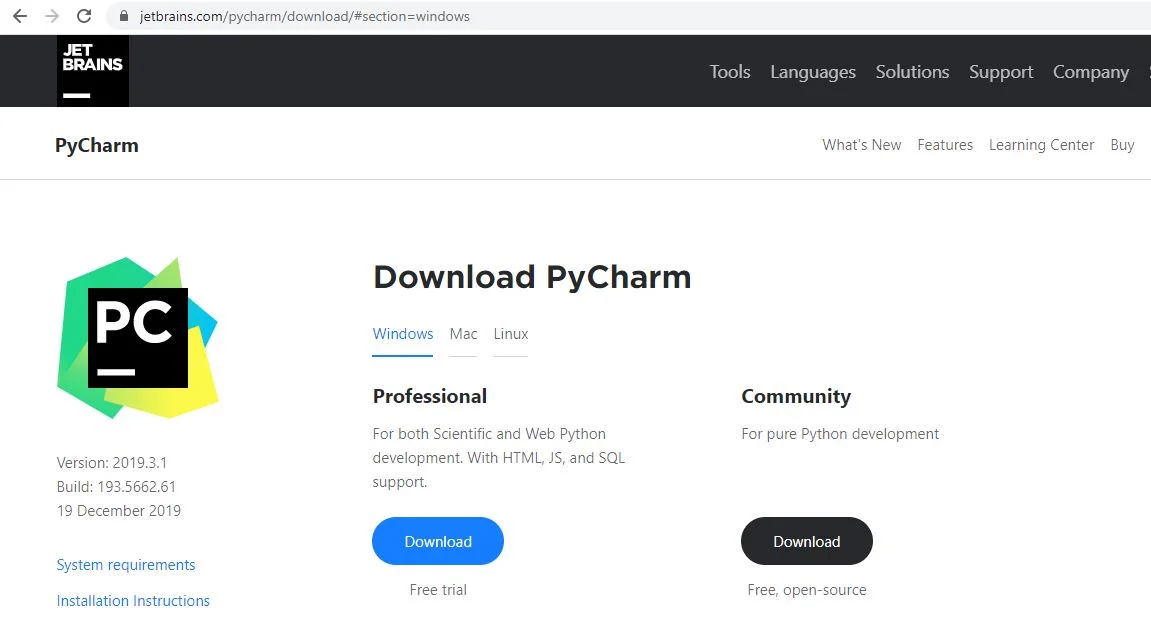
3. Click the “download” button as shown in the figure. After downloading, users will get a PyCharm installation package (pycharm-community-2019.2.2 version).
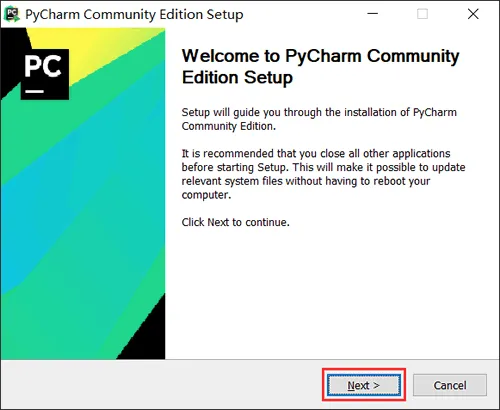
4. Double-click to open the downloaded installation package and start the installation officially. Then, select “Next” directly.
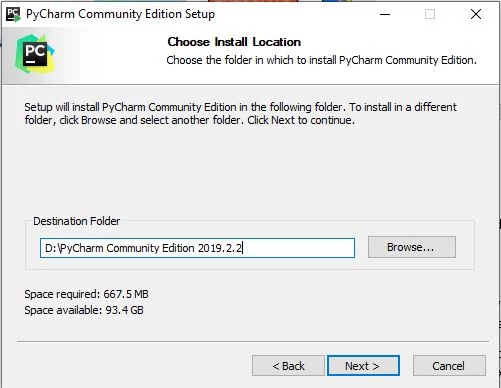
5. For destination folder, it is recommended not to install it on the system disk (normally C drive is the system drive). Here you can choose to install on the D drive. And click “Next”.
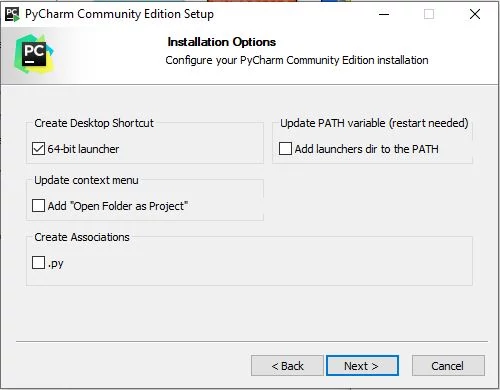
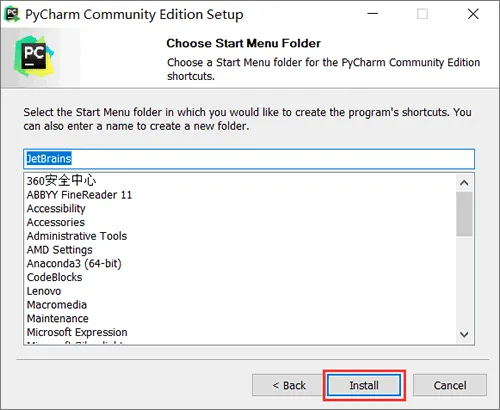
6. You need to choose the installation options and if there are no special needs, you can follow according to the following figure. Then select “Next”.
7. Click “Install” and wait until the whole installation process completes.
More Tutorials:
Python Installation - Linux (Ubuntu)Python Installation - Mac OS
Integrated Development Environment - IDE
Python - Basic Variables
Python - Sequence Introduction
Python - Output Formatting
Python - Escape Character
Python - Type Conversion
Python - Numbers
Python – Arithmetic Operators
Python – Assignment Operators
Python – Comparison Operators
Python – Logical Operators
Python – Precedence and Associativity Operators
Python – Bytes Type and Usage
Python – Long & Raw Strings
Python – Concatenate Function
Python – Slice Function
Python – Length and Split Function
Python – Join and Count Function
Python – Find Function
Python – Index Function
Python – Alignment Function
Python – Startswith and Endswith Function
Python – String Case Conversion
Python – Remove Specified Character
Python – Encode and Decode Function
Python – dir and help Function
Python – Input Output Introduction
Python – Basic Operation
Python – Open Function
Python – Read Function
Python – Readline Function
Python – Write Function
Python – Close Function
Python – Seek and Tell Function
Python – Pickle Module
Python - File Input Module and Linecache Module
Python - Pathlib Module
Python - Pathlib Module
Python - os.path Module
Python - fnmatch Module
Python - Tuple Introduction
Python - List Introduction
Python - List Add Element
Python - List Delete Element
Python - List Modification Element
Python - List Find Element
Python - Dictionary Introduction
Python - Dictionary Basic Operation
Python - Dictionary Method Guide
Python - Set Collection
Python - Set Basic Operation
Python - Set Basic Method
Python - Frozenset Method
Python - If Condition I
Python - If Condition II
Python - While loop
Python - For loop
Python - Pass Statement
Python - Break Statement
Python - Zip Reverse Function
Python - Function Introduction
Python - Positional Parameters
Python - Key Arguments
Python - None and Return
Python - Variable Scope
Python - Local Function
Python - Closure Method
Python - Lamdba Expression
More Python Exercises:
Python String ExercisesPython List Exercises
Python Library Exercises
Python Sets Exercises
Python Array Exercises
Python Condition Statement Exercises